Wednesday, January 28, 2015

Rosemary Roasted Potatoes

The recipe today is a huge (like top ten) favorite of me & my husband. I'm not even kidding you when I say, we eat this as one of our supper side dishes an average of 2-3 times a week. I mean, we like potatoes in general, but this recipe - as some like to say - is the bomb diggity! They are so good & actually the way they're cooked is really good for you. The skins are still on & they're not loaded with all kinds of delicious cream & butter like mashed potatoes, so basically you can eat large portions of these without feeling the slightest bit guilty. You're welcome. ;)

Red potatoes taste the best for this recipe (& look the prettiest) but I have also used Russet potatoes and they work great as a substitute if you don't have red potatoes on hand.


I prefer using fresh Rosemary - the taste & smell are far superior to dried - but I was all out of that and had to use this. Penzey's Spices are my absolute favorite but really any brand will work.


The seasonings for these potatoes are so simple, yet so surprisingly flavorful. They just have rosemary (of course), kosher salt, pepper, olive oil, & garlic. 


Just mix it all up...
(I love the combination of colors here, the red & white potatoes with the green rosemary and black pepper is very pleasing to the eye!)


And into the oven it goes!


Enjoy as a single dish meal like I did the other night. ;)


Or as a side dish to a meal as my husband did.


These go great with just about any meat/main dish and are perfect for big gatherings or holidays because they're so simple to throw together but they look/taste more complicated. ;)

Happy Cooking!

Rosemary Roasted Potatoes *Makes 3-4 servings*

Ingredients:
1 1/2 pounds small red skinned potatoes
1/8 c. olive oil*
3/4 tsp. Kosher salt
1/2 tsp. freshly ground black pepper
1 tblsp. minced garlic (3 cloves)**
2 tblsp. minced fresh rosemary leaves

1.  Preheat the oven to 400 degrees.

2.  Cut the potatoes in half or quarters in a bowl with the olive oil, salt, pepper, garlic, & rosemary.  Toss until the potatoes are well coated. Dump the potatoes on a baking sheet & spread out into 1 layer (you don't want the potatoes to be scrunched together on top of each other as that will affect the cooking). Roast in the oven for at least 1 hour or until browned & crisp. Flip twice with a spatula during cooking to ensure even browning.

3.  Remove the potatoes from the oven & serve.


*Do Not substitute vegetable or canola oil for the olive oil as that does affect the taste here
** You can use garlic powder in place of the garlic cloves - each clove equals 1/8 tsp. of garlic powder


--Recipe from Food Network: Ina Garten--

Monday, January 26, 2015

Homemade Flour Tortillas


Happy Monday!  Hope you all had a relaxing weekend. :) I came across the recipe for today's post just a week or so ago on the Brown Eyed Baker's blog. I had become interested in finding a good tortilla recipe just a week or two before I saw this one, so the timing was perfect! Last week, I tried out the tortilla recipe for some burritos I would be making and was so impressed by it. The recipe is very basic & doesn't take long at all. I have no need to look further for a tortilla recipe! :)

Once you've mixed the dough, shaped it into 12 balls, & let it rest for 10 minutes, you'll roll each ball out very thinly. You only need a tiny sprinkling of flour on top of the tortilla to roll these out without sticking.


They'll then be placed one at a time into a cast iron skillet or non-stick pan. Each tortilla takes about 30 seconds per side. You will know it's time to flip them when 'bubbles' start appearing. 


The end result will be 12 tortillas that taste a thousand times better than any you could buy at the store!


You know, I've never been very fond of tortillas or foods/meals that use them and now I think I know why! The tortillas at the store can in no way compare to a homemade batch. Try it for yourself & let me know what you think!

Homemade Flour Tortillas

Ingredients:
3 c. all-purpose flour
1 tsp. baking powder
1 tsp. salt
1/3 c. oil (olive, vegetable, coconut)
1 c. warm water

1. In a food processor with a dough blade, pulse together the flour, baking powder and salt to combine, 2 to 3 pulses.* 

2. With the machine running, slowly add the oil and water until a cohesive ball of dough forms.* Once the ball of dough forms, process (or knead) for 30 additional seconds. (If making by hand, use a rubber spatula to mix in the water, then knead by hand until soft and only slightly tacky.)
4. Divide the dough into 12 equal pieces and shape into balls, then cover with a clean dish towel and allow to rest for 10 minutes.
5. Heat a large non-stick saute pan or cast iron skillet over medium heat. Meanwhile, working with one ball of dough at a time on a clean work surface, sprinkle a small amount of flour on top of the dough, then roll into a very thin circle, 8 to 10 inches in diameter. Place the round into the dry skillet and cook for about 30 seconds per side. Since temperature can range from burner to burner, look for multiple small bubbles to form and the edges of the dough beginning to look dry, then turn over and repeat. Place the cooked tortilla on a plate and cover with a clean dish cloth to keep warm. Repeat with the remaining balls of dough.
6. The tortillas can be kept in a zip-top plastic bag in the refrigerator for up to 5 days, or individually wrapped and frozen for up to 2 months. To warm, cover with a damp paper towel and microwave for 10 seconds.

*In steps 1 & 2 you can use a bowl & a whisk, wooden spoon, or spatula in place of a food processor.*


Friday, January 23, 2015

Kitchen Tour!


I am so excited to finally give y'all a tour of my kitchen via some photos! Way back in the spring when I first got married and was getting settled in my new house (with my new oven! ;) ) I had said I would post a "kitchen tour" on my blog and then I never did. Of course, y'all have seen snippets of my kitchen in photos of food for recipe posts, but this is the real deal. ;) So, I finally had a chance last week to take some photos of my (clean) kitchen during the daytime when the lighting was good & am happy to show y'all where it all goes down!

This is, literally, the big picture. Basically the full view of my kitchen from the dining room.  I love how open it is (makes it great for dancing to my favorite tunes while I'm waiting for something to cook!). I'm also a huge fan of the white cabinets & appliances - a little more work to keep clean, but it brightens the kitchen and gives it a fresh feeling.


This would be my NEW OVEN & microwave!  Yep, I parted ways with "That Old Oven" when I moved.  The oven is excellent and I really love the stove top too. This was my first time having & cooking on a glass top stove so I was a little anxious at first that it would be difficult to keep clean or super fragile, but I actually really like it... and it's way easier to clean than the coils! 


My counter tops are a little more cluttered than I would prefer but these are all things that I use multiple times a week if not every day, so I keep them on there for now. I don't know what I would do without my handy utensil crock! It keeps all of my most-used utensils right there at my fingertips & as you can see I've had no problem stuffing it to the max!  I have two recipe boxes - one that I like to have out during the spring & summer, and one that I like to have out during the fall & winter (this one obviously being the winter one).  The butter bell beside it is one of the best things ever invented! If you don't have one or have never seen one, it keeps butter soft & spreadable but also keeps it good by way of cold water that is kept in the bottom portion of it. It really is one of my top 10 favorite kitchen items! I got mine on Amazon - they have a great selection. And yes, that is a bowl of bacon grease - keepin' it real, y'all. I almost removed it from the picture but decided not to because that's pretty typical in my kitchen and this is my kitchen tour after all! :)

Love my Kitchen Aid Mixer!


The sink area - one lone green onion in the jar on the window. You can regrow green onions by sticking them in a jar of water - they regrow in about 3 days! The sponge looks dirty, but it gets cleaned in the dishwasher weekly, so it's just stains. :)


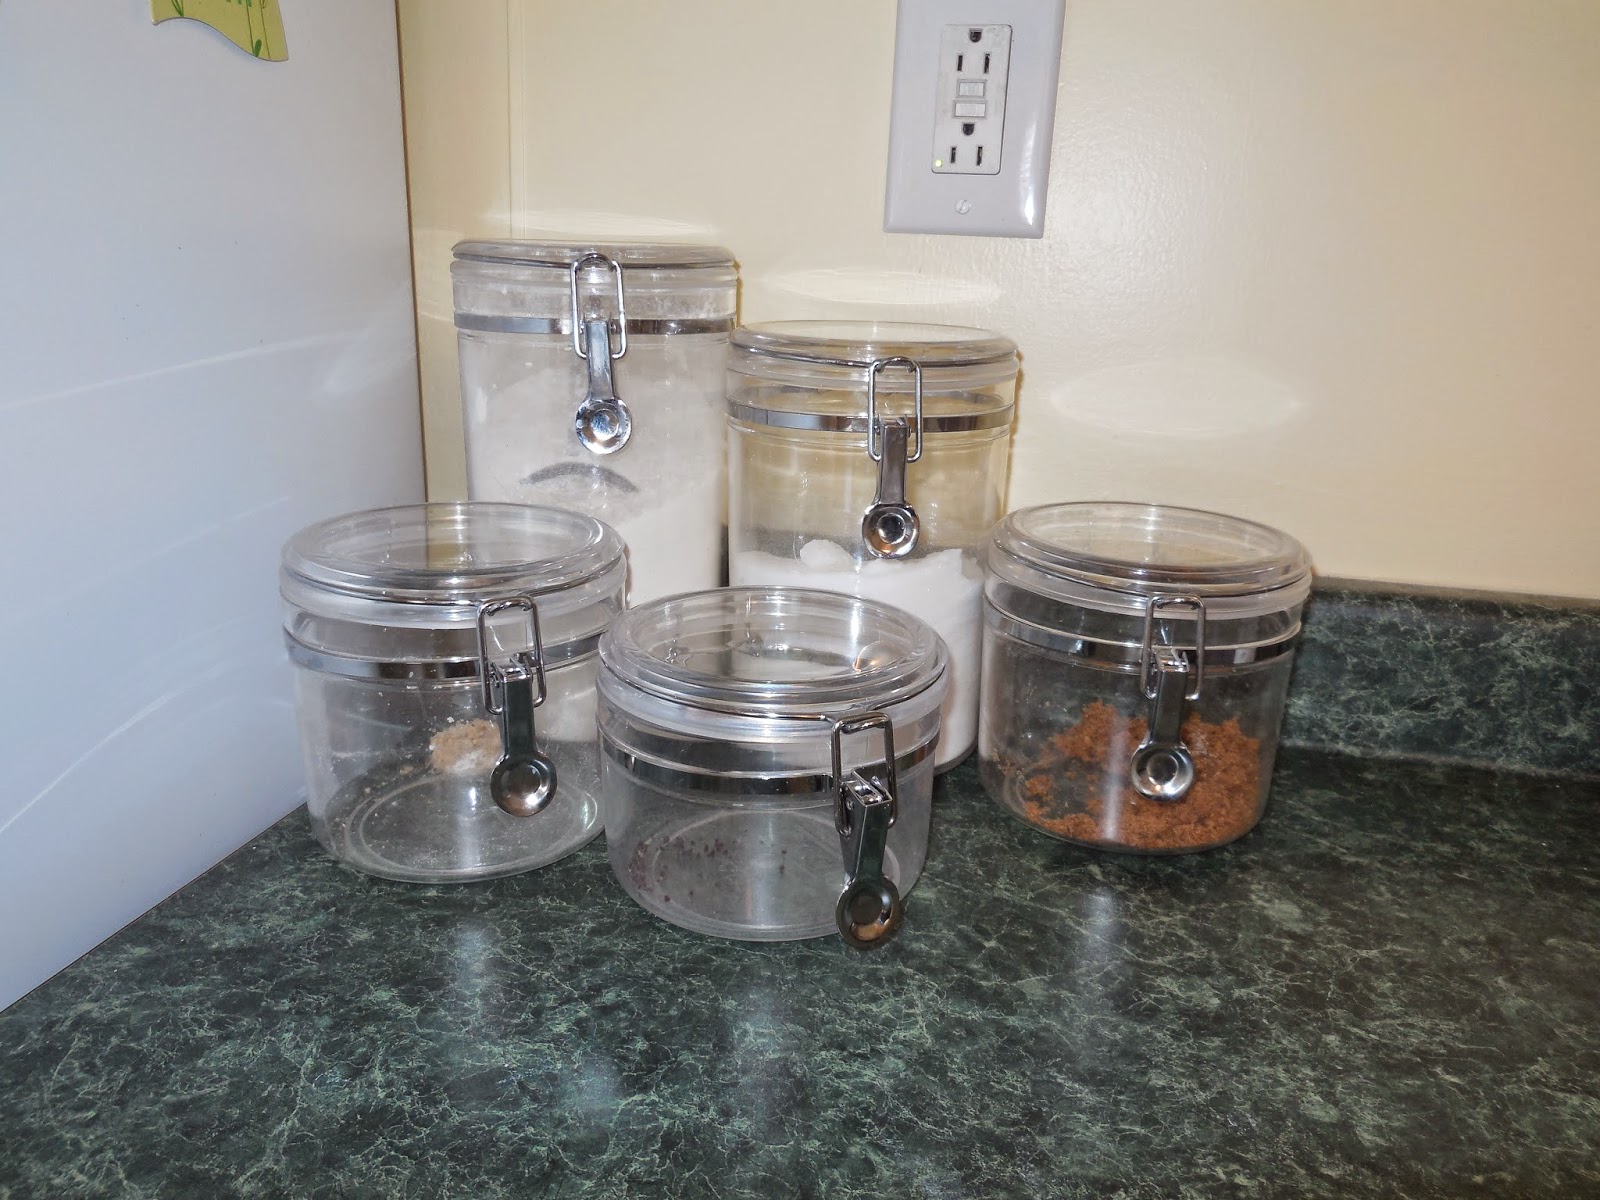
These canisters are literally the favorite thing of just about everyone who has seen my kitchen! Everyone comments on them. I absolutely love them too. Originally I had wanted the stainless steel ones, but I'm really glad now that I got the clear ones. Makes it easy to tell when I need to refill/restock baking supplies! They're a little sad looking right now, since 2 are empty. One needs to be refilled with chocolate chips & the other one did have light brown sugar in it, but I haven't refilled it yet because I noticed that the sugar clumped up so bad in the containers! I guess they aren't airtight enough for brown sugar. So, I'll probably end up filling it with cornmeal from now on instead.


Where I keep my timers as well as a dry erase board on which I write "to-make" lists and sometimes, notes to my husband. ;)  The list below was for my food prep for the past week to make sure we had foods ready for our breakfasts & lunches during the week instead of the same ol' deli or pb&j sandwiches. ...Pardon my handwriting, I don't normally write like that, it just never does look good on a dry erase board. My timers are from Thermaworks & Pampered Chef - both were wedding gifts and two of the best brands you can get for timers!


And I wanted to show y'all this! It's a magnet on my fridge with one side showing measurement equivalents & the other side showing recipe conversions. I got this from the Pampered Chef as well & it has come in so handy! Instead of pulling out a cookbook or Googling a recipe conversion, I've got it right there on my fridge anytime I need it.

And, lastly, the view of my kitchen from the dining room which also shows the extra counter space & extra sink I have for preparing food.  It's also great for entertaining as the perfect place to put appetizers & refreshments while people mingle in both the living room & kitchen. Also a great spot to set up a mini-buffet. ;)


Anyway, that's my kitchen! I hope you all enjoyed this post. Enjoy your weekend & I'll have a new recipe on Monday. :)


Wednesday, January 21, 2015

Biscuits - Three Ways

Today I want to share three different recipes with you - all for the same food! Biscuits are one of my favorite foods of all time. Who couldn't love a biscuit??? Split one in half straight out of the oven and a puff of steam escapes from the tender, flaky center - all ready to be smothered in butter along with a spoonful of jelly. Makes me hungry just picturing it. ;) 

Over the years, baking powder biscuits were my go-to. However, within the past year I have also found a recipe I love for lard biscuits & finally attempted buttermilk biscuits. I can say, without a doubt, buttermilk biscuits are my absolute favorite. The recipe I use reminds me so much of the biscuits served at Cracker Barrel - that's enough of an explanation right there!


Below I have listed the 3 recipes that I alternate using when I make biscuits. Try them out and let me know which one is your favorite! :)


Buttermilk Biscuits


Ingredients:

2 3/4 c. self-rising flour
1 1/4 c. buttermilk
1/2 c. shortening or lard
butter

1. Preheat oven to 400 degrees. Pour 2 cups of flour into a bowl & cut in lard with hands or pastry blender. Add buttermilk & lightly mix the dough just until it starts to come together. If it looks really wet, add more flour a little at a time up to a 3/4 cup. 


2. Turn dough out onto a floured surface and knead lightly. Do not knead too much as that will make the dough tough. 


3. Pat into a circle that's about a 1/2 inch thick.(It's important that you pat the dough and do not use a rolling pin.) Use a biscuit cutter or similar round object to cut out the biscuits. 


4. Place the biscuits in a cast iron skillet close together, touching but not squishing each other. Make a fist and use your knuckles to lightly press down on each biscuit making an indentation. 


5. Bake in oven for 12 - 15 minutes or until golden brown on top. Brush generously with melted butter immediately upon removing skillet from oven. 


*Makes approximately 10 biscuits*


Lard Biscuits


Ingredients
2 c. all-purpose flour
1 tblsp. baking powder
1 tsp. salt
1/3 c. lard
2/3 c milk

1. Preheat oven to 450 degrees. Place rack in center of oven. 

2. Whisk together flour, baking powder, & salt. Cut in lard until it resembles small peas. Stirring with a fork, gently add milk to make a soft dough. Knead dough gently in bowl 4 times with floured hands.

3. Roll dough on a lightly floured surface to about 1/2" thick. Cut with a floured biscuit cutter (or object of similar size).

4. Place biscuits on ungreased baking sheet & bake until golden brown, about 12 minutes.

5. Brush generously with butter while still hot.

*Recipe from southernbite.com


Baking Powder Biscuits


Ingredients
2 c. all-purpose flour
1 tblsp. sugar
3 tsp. baking powder
1 tsp. salt
1/2 c. shortening
3/4 c. milk

1. Heat oven to 450 degrees. In large bowl, mix flour, sugar, baking powder and salt. Cut in shortening, using pastry blender or hands, until mixture looks like fine crumbs. Stir in milk until dough leaves side of bowl (dough will be soft and sticky).

2. On lightly floured surface, gently roll dough in flour to coat. Knead lightly 10 times. Roll or pat 1/2 inch thick. Cut with a floured  biscuit cutter or similar object. On ungreased cookie sheet, place biscuits about 1 inch apart for crusty sides, touching for soft sides.

3. Bake 10 to 12 minutes or until golden brown. Brush generously with butter while still hot.


Enjoy these recipes & remember, butter makes everything better! =)

Monday, January 19, 2015

French Toast


Happy 2015!  With the start of the new year, I'm very excited about trying some new recipes and I've got a very tasty one to share today. I absolutely love French toast, but I don't make it very often because I can never get it to turn out too pretty. Practice will make perfect though, so when I had a craving for it this past week I decided to go ahead and make some over the weekend. The recipe I used is so flavorful! I absolutely loved it & immensely enjoyed every bite. The only thing I did differently from the recipe was that I added a splash of vanilla to the egg mixture. You can never go wrong with vanilla in recipes like that! ;) Also,make sure the bread you use is a more rustic bread that is thickly sliced. (I used sourdough bread that I sliced myself) You want the bread to be very thick & even slightly stale so that is doesn't get soggy when dipped in the egg mixture. 

Mine still wasn't so great in the way of looks, but the taste was exceptional! 


So go ahead and save this recipe for the weekend (you can slice the bread & prepare the egg mixture the night before) or maybe treat yourself to a 'breakfast for dinner' tonight. Enjoy & add lots of whipped cream! :)


French Toast

Ingredients:
1 c. half & half
3 large eggs
2 tblsp. honey, warmed in microwave for 20 seconds
1/4 tsp. salt
8 (1/2 inch) slices day old or stale bread *brioche, challah, & sourdough work well*
4 tblsp. butter

1.  Whisk together the half & half, eggs, honey, & salt.  Pour the mixture into a pie pan and set aside.

2.  Preheat overn to 375 degrees. Dip bread into egg mixture & allow to soak for 30 seconds on each side. Then remove to a cooling rack that is sitting on a sheet pan & allow slice to sit for 2 minutes.

3.  Over medium-low heat, melt 1 tblsp. butter in a saute pan. Place 2 slices of bread at a time into the pan & cook until golden brown, about 3 minutes, on each side. Remove slices from the pan and place on oven rack for 5 minutes. Repeat with remaining slices of bread. 

Serve with fruit, jelly, whipped cream, or syrup!

*Recipe from Food Network - Alton Brown*

NOTES:
--If the slices of bread are large (as with the sourdough bread I used) you will need to make a double batch of egg mixture in order to have enough for all 8 slices.


Sunday, December 28, 2014

Creative Leftovers

Greetings! I hope you all had a very Merry Christmas! If I was a good, diligent blogger I would have done a Christmas post, but I forgot to set up an automatic post for Christmas and just didn't want to when I remembered on Christmas day! ;) So, Merry Christmas 3 days late. And now we move on to the New Year...

Which is kinda what inspired today's post about leftovers. I've gotten very focused with my finances over the past few months and have been observing areas in which I can improve. One HUGE area that I have struggled with since I've been married is spending too much on groceries... and then forgetting about certain things in the refrigerator until they've turned into a smelly-make-me-gag-science- experiment-gone-wrong. That frequently happened because I cooked way more food than any 2 normal people could eat in a week, yet I'd be back at the grocery store again at the start of the next week! Soooo, one of my plans for 2015 is to be more responsible with my grocery budget and more aware of what we already have in the fridge/freezer/pantry. I've already gone ahead and started on doing that and am blown away by how much our grocery bill has gone down and how creative we can get with leftovers to make sure they don't go to waste!

Recently I made a copycat Panera Broccoli Cheddar Soup for supper. While I'm not the biggest fan of anything broccoli related, I did want to try it and my husband was really excited about it! ;) It ended up okay, but seriously lacking in cheese and very broccoli-ish. (blah!) So we ate it that night and then it sat in the fridge for 3 days. It wasn't that good, but I was determined not to let it go to waste!! So, I decided to add some Orzo I had in the pantry. Then I decided to cook it in a casserole dish and add a few breadcrumbs in addition to the Orzo to make it thicker.


 Then I came across some leftover ham from a Christmas dinner and threw it in there.


 Finally, I decided to make the top more appealing by browning some Panko breadcrumbs in butter and olive oil and sprinkling them over top.


  The finished product was a broccoli-orzo casserole that didn't taste half-bad! And, I was able to use up the leftover soup rather than tossing it. Yay! Just a few simple ingredients that I already had on hand and the 'meh' soup was rescued from the deep, dark, cold dungeons of the fridge. Success!


What do you have in your pantry that you would have used to give this leftover some pizzazz? Leave your answer in the comments below!


Sunday, December 7, 2014

Chicken Biscuit Cobbler


Y'all are going to love this recipe.  It's got a little of this...


And a little of that...


Convinced yet? ;)  Anything with both bacon and butter is bound to be mouth-watering.

I found this recipe in a magazine I was browsing through recently (and for the life of me, I cannot remember the name of the magazine - it wasn't one I'm familiar with).  Anyway, I wrote it down because the photo of it looked so. so. SO. fabulous.  I was practically drooling over it.  Seriously.  One glance at the list of ingredients and the steps for making it and I knew this was a recipe I would truly love cooking up!  Just think about it - Chicken. Biscuit. Cobbler.  And then you find out, it's got bacon and butter in it too!  I'd be a fool to pass this one up.  

Truly, I enjoyed this recipe so much.  We live in a world of instant meals and shortcuts to everything.  And while that's great at times (I have a day job and know how convenient it can be to have a meal ready in 20 minutes or less at the end of the day!), I feel like as with many things, we lose a lot by making it as quick as possible.  Waiting patiently can be so rewarding.  Taking the time to cook a detailed meal is incredibly satisfying.  If I had to describe this recipe with two words I would say 'hearty' and 'warm'.  The smell that fills the kitchen while you cook this just warms you from the inside out.  Gradually adding in vegetables to saute and then making the sauce really makes you appreciate each step of the process.  This really is one of those recipes that feels... nurturing... if that makes sense. ;)

So without further ado...

Chop/slice all of your veggies.  Can I tell you a little secret?  This was my very first time ever cooking with mushrooms!  I strongly dislike mushrooms but decided to go ahead and keep them in the recipe because my husband loves them.  And it turns out, once they're cooked and mixed in with other ingredients, they're not bad.  Well, not too bad anyway. :)


Saute them so they're all a little soft.(I have no clue why I sliced the carrots that way, no clue at all.  They'd be better sliced the normal way in little rounds.)  


Then, you'll add the wine, flour, and broth (separately). 


Next comes some cream and seasonings - I love the color that the chives and parsley add!


After that you stir in the chicken.


Which by the way, was well chopped with my favorite little Pampered Chef tool - the Salad Chopper.  It makes chopping/shredding chicken sooo easy and quick.


When you're finished with that, mix the ingredients for the biscuit topping.  This is where the crispy, salty, oh-so-delicious bacon crumbles in.  (Ignore the background mess.)


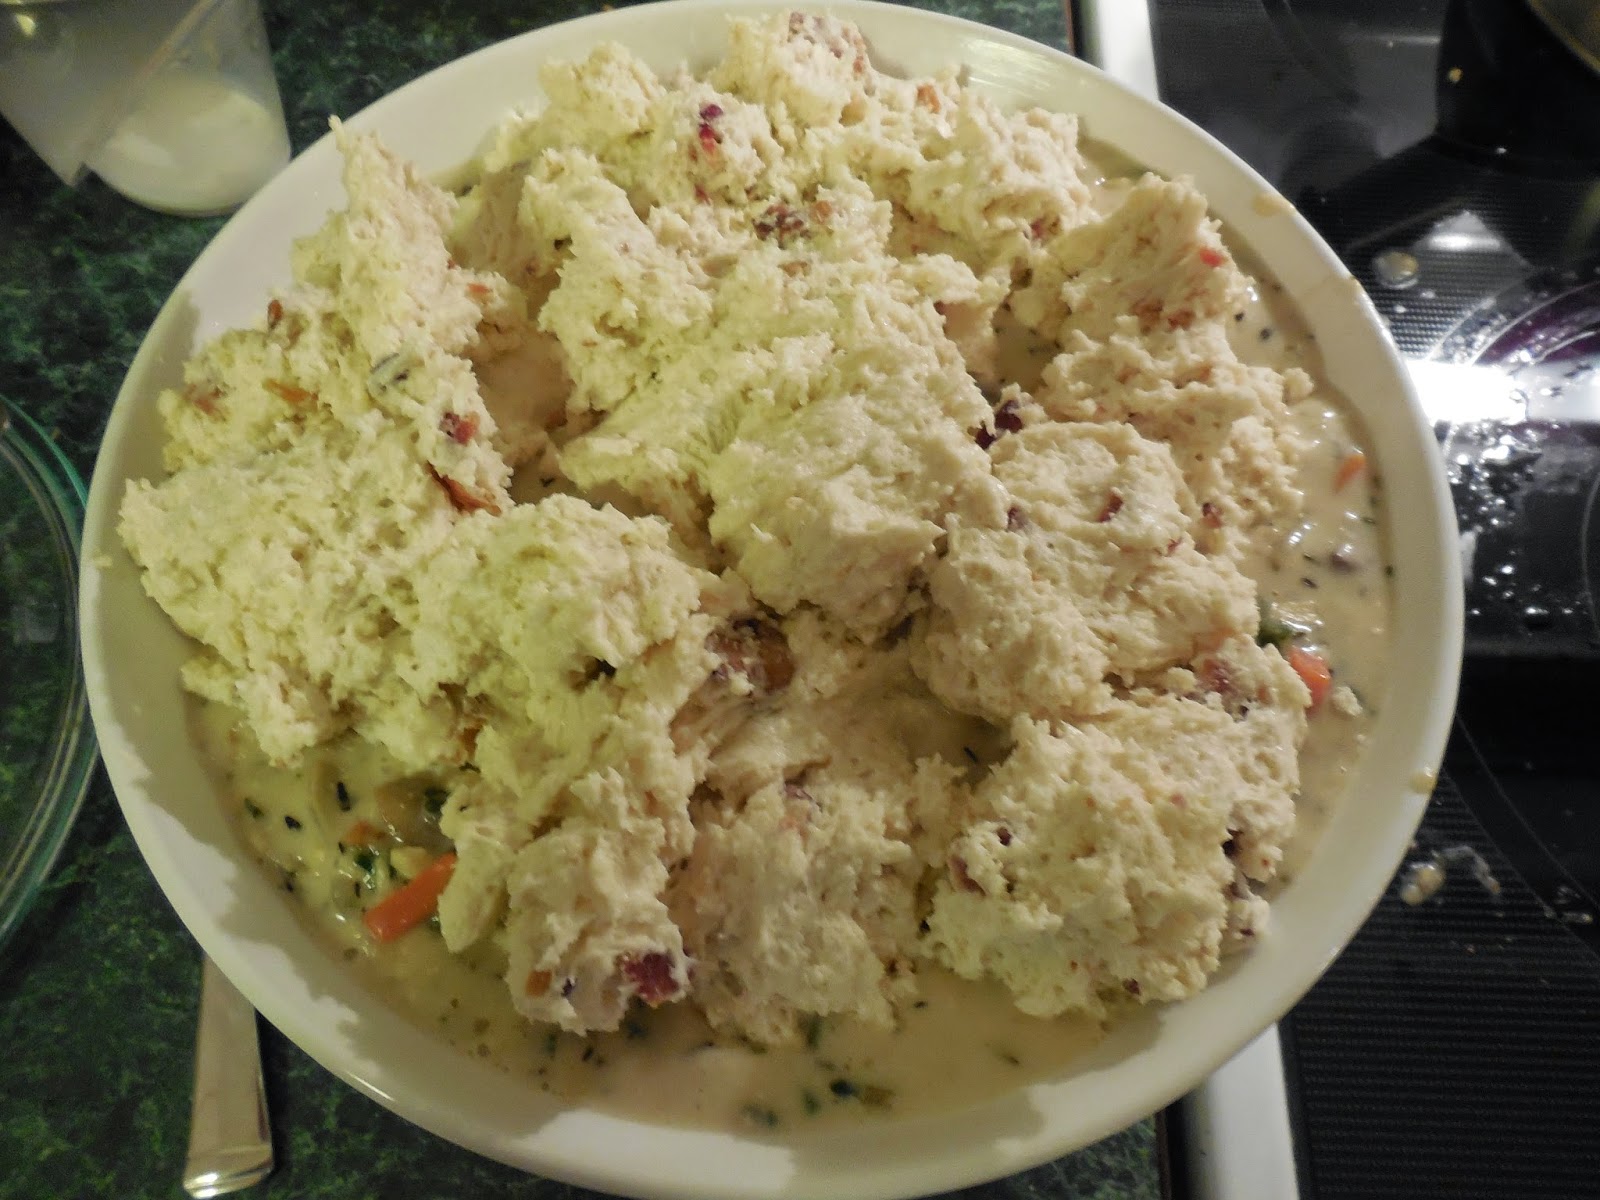
Top with biscuit topping and pop in the oven!


It came out really messy because the only casserole dish I had close to the size called for was a tad to small.  But I don't care.  It did not take away from the yumminess at all!


Once you have gotten a delicious big whiff of the hot-out-of-the-oven chicken biscuit cobbler, scoop some into a bowl and enjoy.  It will make you feel so warm and cozy and full.  Perfect for a cold winter night. :)


Chicken & Biscuit Cobbler

Ingredients:
3 tbsp. butter
1 c. sliced carrots
1 medium onion, chopped
2 packages fresh mushrooms, quartered (8 oz.)
2 garlic cloves, minced
1/2 dry white wine
1/3 c. all-purpose flour
3 cups reduced-sodium chicken broth
3/4 cups whipping cream
1 tbsp. white wine vinegar
3 tbsp. sliced chives
3 tbsp. chopped parsley
2 tsp. chopped rosemary
2 tsp. chopped thyme leaves
8 cups shredded cooked chicken (I just did 4 chicken breasts)
Kosher salt
Freshly ground black pepper
2 1/2 cups self-rising flour
1/2 tsp. sugar
1 1/4 cups chilled buttermilk
1/2 cup butter, melted
1/2 cup chopped cooked bacon (5 thick bacon slices)
Garnishes of chopped fresh chives & parsley

1. Preheat oven to 400.  Melt 3 tbsp. of butter in a Dutch oven over medium-high heat.  Add carrots and onion, and saute 5 minutes.  Add mushrooms; saute 5 minutes or until tender.  Stir in garlic; saute 2 minutes.  Add wine; cook 2 minutes.  Sprinkle with 1/3 cup all-purpose flour, and cook, stirring constantly, 2 minutes or until thickened.  Stir in cream and next 5 ingredients.  Stir in chicken, and season to taste with salt and pepper.  Cover and remove from heat.

2. Whisk together 2 1/2 cups self-rising flour and 1/2 tsp. sugar in a medium bowl.  Stir together buttermilk and 1/2 cup melted butter in a small bowl.  Stir buttermilk mixture and bacon into flour mixture until dough pulls away from sides of bowl. 

3. Return chicken mixture to medium-high heat; cook, stirring constantly, 2 minutes or until bubbly and hot.  Spoon mixture into buttered 3 qt. ceramic or glass baking dish.  Drop biscuit dough by level 1/4 cupfuls, 1/2 inch apart, onto chicken mixture.

4. Bake at 400 for 30 - 35 minutes or until browned and bubbly.

*Makes 8 servings*